Showing posts with label trick. Show all posts

WhatsApp: Voicemail and Call Back Features Introduced

July 21, 2016
Recently, a new Fixedsys font was introduced on Whatsapp which could be used by typing ``` before and after any word or sentence (eg. ```Hello```). Now, whatsapp has come up with Voicemail & Call Back features which can be found in its beta version 2.16.189. You can get it right now by becoming a beta tester or by just downloading it from apkmirror.

Tech-RG Voice mail & call back features on whatsapp
Voice Mail & Call back
feature on WhatsApp
Whenever a whatsapp call is either rejected or goes unanswered, Three new buttons will be displayed on the screen-

Cancel - which will take you back to the chat screen.
Call back - which will redial to the contact.
Record voice message - which will allow you to record a voice message by holding down the button.

All of these features actually existed before the update too; you could redial or send a voice message from the chat screen, but the update seems to provide the right feature at the right moment and it makes things a little more easier.

More features like Video Calling, GIF support etc will also soon be coming to WhatsApp. Follow the blog to know about them first!

Disable the Auto Sync Pop-up message on Samsung Galaxy S7, S6, Note Series [NO ROOT]

April 14, 2016
Samsung's flagship devices, like the Galaxy S6, S7 and the Note Series, running on the latest Marshmallow version of android, are presently some of the best phones you can own. But they too have minor glitches and need UI refinements. 

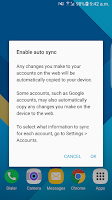
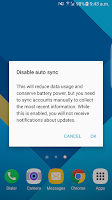
One of such being the annoying pop-up dialogue box with the message "Enable auto sync" or "Disable auto sync", asking for confirmation each time one tries to enable/disable the auto sync from from the notification quick settings.


If you find the pop-ups unnecessary, this is the Best solution you can presently have without root. Here, we'll automate your phone to automatically click on the OK button and get rid of the stupid pop-up dialogue box.

(This solution will work on all android devices with this pop-up. S6, S6 edge, S6 edge+, S7, S7 edge, Note 5, etc are supported)

---

It's a Tasker solution & you'll need the following app: Tasker and AutoInput

**Tasker is a paid app (worth paying). You can also try to google "Tasker apk".
AutoInput is available free only for trial, but here is a trick: If you don't start the 7 day trial by logging in, you can use the app as lite version for free, forever, but with few limitations.**


PREREQUISITES:

  • Install both the apps on your device.
  • Enable tasker and turn off Beginners mode from its preferences. (If you're unfamiliar with it, just google)
  • Enable accessibility service for both the apps. (Settings -> Accessibility -> Under Services group)
  • Enable administrator access for both the apps. (Settings -> Lock screen & security -> Other security settings-> Device administrators)


Step 1: Long press on the Home icon at the bottom left and click on Add + and give your project a name. eg., Sync Auto OK


Step 2: In the tasker app, under Profiles, Create a new profile by clicking on the '+' at the bottom right.

Step 2

Step 3: Click on Event -> UI -> New Window
Step 4: Fill the fields as follows:

  • Label: Enable auto sync
  • Window Type: Dialog
  • Priority: Normal
Step 4


Step 5: Press the back button to save.
Step 6: In the next pop-up menu, Select New Task +
Step 7: Assign a task name (eg. Auto Click OK) & click on the Tick mark.

Step 7


Step 8: Now, Click on the '+' at the bottom center.
Step 9: In the pop-up menu, select Plugin -> AutoInput -> Action
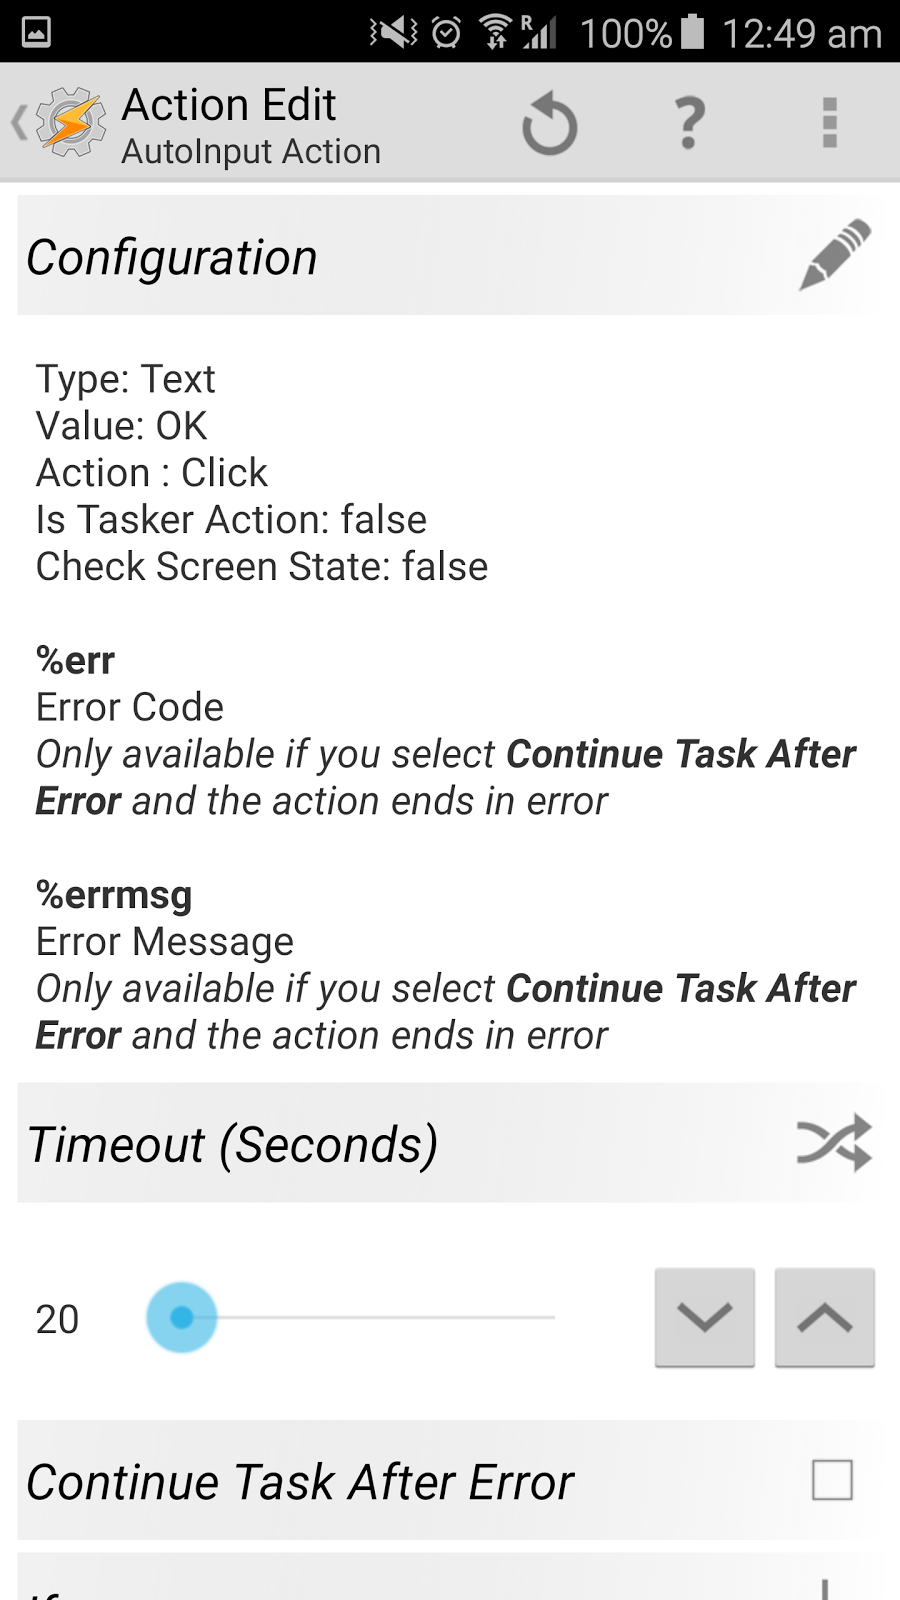
Step 10: Now, click on the edit button (pencil) under configuration
Step 11: Under manual setup, select & fill in the following fields:

  • Action: Click
  • Field Type: Text
  • Field Text: type "OK" (without quotes)
  • Save the settings by clicking on the tick mark on top right of the screen.

It should look like this after completing step from 8 to 11
Step 12: Press the back button twice.
Step 13: You should now be in the Profiles Tab, make sure everything looks like this:
Step 13

Step 14: Long press on the title of your profile ("New Window Enable auto sync, Dialog..") and select clone from the menu options. (Refer to the screenshots below)


Step 15: Click on the Event(trophy icon) from the second(cloned) profile and change the value of label from "Enable auto sync" to "Disable auto Sync" (without quotes).

Step 15
Step 16: Press the back button and make sure everything looks like this.

Step 16

You're done! Now you can exit from the app, & try turning on/off auto sync from the quick toggles & you'll notice how the pop-up gets dismissed automatically in less than a split second.

If you have any issues, you can comment below or contact through the Contact us page & I'll try to reply ASAP.

The above solution was successfully tested on Samsung Galaxy S6 edge running Marshmallow 6.0.1 with Tasker v4.8u1m & AutoInput v2.0


---
Disclaimer: This blog/owner of this blog disclaims all/any of the damage/loss caused to you/your device/data/etc due to use of the above stated method. You agree to perform the above at your own complete risk.

Tweak your android smartphone for a faster experience

March 11, 2016
Android smartphones from all manufacturer- Samsung, HTC, Moto, LeEco, Micromax etc, come with a lot of effects, animations and transitions. Even though accompanied with multi-core processors & several gigabytes of RAM, everyone at some point has wished that the apps opened faster or their phone performed better.

Though the animations and transitions may be aesthetically pleasing to the eye, they unnecessarily slow down the opening & closing of apps, and all other menus and windows.

You can increase the speed of these transitions and make your smartphone faster.

Follow these easy steps & notice the difference.

Step 1: Navigate to your phone's Settings -> About Device
Step 2: Once inside the About Device, scroll down to find the Build Number.

Step 2


Step 3: Click 7-8 times repeatedly on the Build Number until you get a message saying "Developer Mode has been activated"

Step 4: Press the back button & find a new setting named "Developer options". 

Step 4


Step 5: Open the Developer options by clicking on it and Turn it on. (You may encounter a warning message, do away with it by clicking on OK)


Step 6: Carefully scroll down and locate the following:
  • Windows animation scale
  • Transition animation scale
  • Animator animation scale
(depending upon your phone, you may or may not find all the 3 options)

Step 7: Click on each of them and select animation scale .5x for each of the three options and exit from the phone settings.


You may choose to turn off the animation scale entirely but it's not recommended as without the animations, the apps/windows open so quick that it becomes unpleasant.

You're done! Clear your RAM, close all background apps and try opening/closing different apps and notice the difference.


Note: Do not change/mess with any other developer options if they are unknown to you, as it may lead to an unstable device. If you do change them by mistake, turn off the developer options & turn it on again.

---
Disclaimer: This blog/owner of this blog disclaims all/any of the damage/loss caused to you/your device/data/etc due to use of the above stated method. You agree to perform the above at your own complete risk.

Exclusive Trick: Save Whatsapp media on your Memory Card & save Phone Memory [NO ROOT]

February 24, 2016
WhatsApp doesn't give a choice to save the photos, videos, audios, chat backup etc to the memory card. But now, with this trick you can have all your files on your memory card & save your already scarce phone memory!


Before we start, I highly recommend you to make a backup (copy) of your whatsapp folder on your computer, in case something goes wrong. Now, let's start.. 

You'll need the app: FolderSync Lite or FolderSync (Paid)


Step 1: Install the above said app.


Step 2: Use your file manager to create a folder in your memory card. Name it as "WhatsApp" (without the quotes).

Step 3: Open the app, go to Folderpairs, & click on the '+' sign at the lower right of your screen.

Step 3


Step 4: Fill the fields as follows:


Unique Name: WhatsApp

Account: SD CARD
Sync Type: To remote folder
Remote folder: browse & select the WhatsApp folder you created on your memory card.
Local folder: browse your phone memory & select the WhatsApp folder.

Step 4

Scheduling:
Check "Use scheduled sync"
Sync interval: Advanced
Sync days: Select all the days (Mon-Sun)
Sync times: 3:00 (you can choose any time but I prefer & recommend it at night)


Scheduling
Sync Options:

Only tick & activate the following,

  • Instant Sync
  • Sync subfolders
  • Sync hidden files
  • Delete source files after sync
Overwrite old files: Always
If conflicting modifications: Use local file

Sync Options

Connections: Leave everything as it is (Everything should show as disabled)


Notifications: Tick & activate 'show notification on sync error' (you can use other options as per your wish too)


Notifications


Advanced: Tick & activate, "Rescan media library" & "Use temp-file scheme".


Advanced


Step 5: Check all the settings properly & Click on save.


Step 6: Exit from the app & reopen it, From the Folderpairs window, click on 'SYNC'.


'Syncing' will be displayed & being the first time, you need to wait patiently, the time taken will depend upon the size of your Whatsapp contents & your phone's processing speeds.


And you're done! 


You can check, the whatsapp folder on your phone memory will be empty & all files/images/audio etc will be available in the Whatsapp folder on your memory card!


The only drawback* of using this trick is that after each night's sync, the media when opened through the WhatsApp app, will be unable to open the media and will show a dialogue saying "Sorry, this media file doesn't exist on your SD card".


Though all the media will be safe on your memory card & can be viewed from your phone's gallery.*\

*This happens as the files have been moved from the default location (phone memory)


IMPORTANT TIP: If you're not running acutely short of your phone storage, you can set the Sync Days under Scheduling option to Mon-Wed-Fri-Sun. By doing this,the frequency of the above said issue can be delayed by 2 days instead of daily.


Depending on your storage status, you can also set the sync to happen just once a week (select any one day) & the media will be available in WhatsApp app for one week before it gets transferred to the memory card.


----
For those who want to know what's actually happening here, this app will move the contents of the 'whatsapp' folder from your phone memory to the 'Whatsapp' folder on the memory card on a scheduled basis (daily night at 3:00AM)


Disclaimer: This blog/owner of this blog disclaims all/any of the damage/loss caused to you/your device/data/etc due to use of the above stated method. You agree to perform the above at your own complete risk.

Enhance your laptop's graphic performance with one simple step

Enhance your laptop's graphic performance with one simple step

June 14, 2014
Amazing Gaming Performance Enhancer

Got a PC/ laptop without/with an old graphic card? Games skip frames & unable to play new games with intense graphics? Don't want to spend a hefty amount on a new laptop?
If YES, this solution is for you.

Enhance your gaming experience in just steps 2 simple steps:

1. Download the registry file from this link.
2. Run it on your laptop/PC. It will ask for permission, click "yes" two times and then "ok" on the "successfully added.." message.
3. Enjoy!

I had found this tweak on the internet after days of net-storming, and tried it on my Acer Aspire V5-471p (which has no graphics card) and found the result to be positive!

Other suggestion to improve your gaming experience are:

1. To put your laptop in High Performance Mode (Battery modes).
2. To change your visual setting from: Control Panel > Performance Information & tools > Adjust Visual effects > "adjust for best performance".


 Disclaimer: This blog/owner of this blog disclaims all/any of the damage/loss caused to you/your machine due to use of the above stated method/registry file.